How to Use FreeBetRange: Step-by-Step Guide
The FreeBetRange platform is structured in a way that the first encounter usually feels the same: you sign up, log in, see five sections—and it’s not immediately clear what to open first or in what order to proceed. This guide answers exactly that: what to do step by step, how to set up each section, and which features are often overlooked during a quick first look.
If you’re not yet familiar with the platform itself—what it does, how it differs from alternatives, and who it’s for—start with FreeBetRange: a complete overview of the tool. This article assumes you already understand why you need FreeBetRange and want to start using it.
Step 1. Registration and initial setup
FreeBetRange runs entirely in your browser: there’s nothing to download or install. All ranges, settings, and training progress are synced across devices via your account.
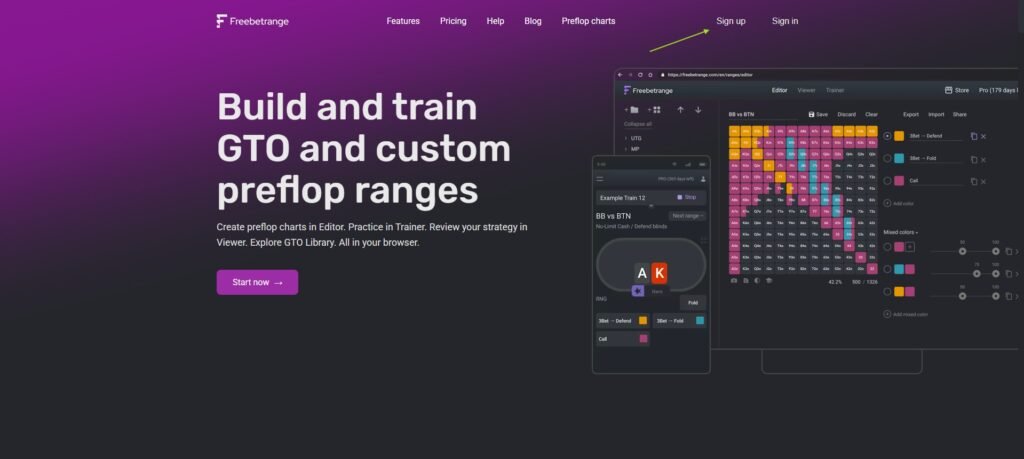
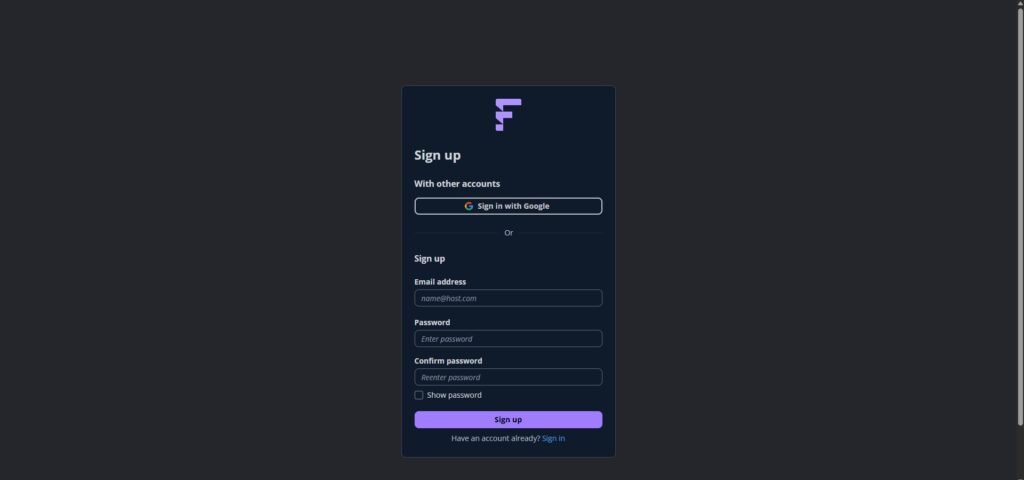
Go to Freebetrange.com and click Sign up. You can register using email or a Google account.
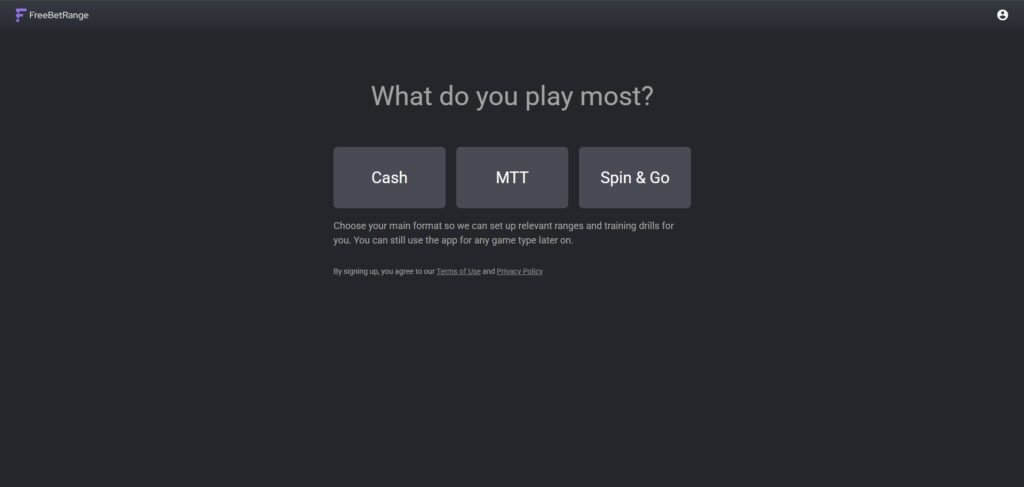
After logging in, you’ll see the onboarding screen: choose your main game format—Cash, MTT, or Spins. This choice determines which ranges and training sessions are loaded by default. You can change it later and work with any formats regardless of this selection.
A convenient way to launch. In Chrome, you can install FreeBetRange as a web app: open the browser menu (three dots) → “Install app.” After that, the platform launches in one click from your desktop or taskbar, without extra tabs.
You can switch between dark and light themes in the user menu in the top-right corner. Dark theme is enabled by default.
Step 2. GTO Library — studying GTO solutions
GTO Library is the starting point for most users. It contains ready-made GTO solutions for Cash, MTT, Spin&Go, and MBR.
How to choose the right solution
The library is filtered by parameters. For Cash games, available filters include rake structure (GG, PokerStars, CoinPoker), stakes (NL25, NL100, NL500), table size (HU, 6-max, 7-max, 9-max), and ante presence. For MTT, there’s an additional Format parameter: ChipEV or ICM. For Spin&Go, you can choose table size (HU or 3-max).
Select parameters that match your actual games.
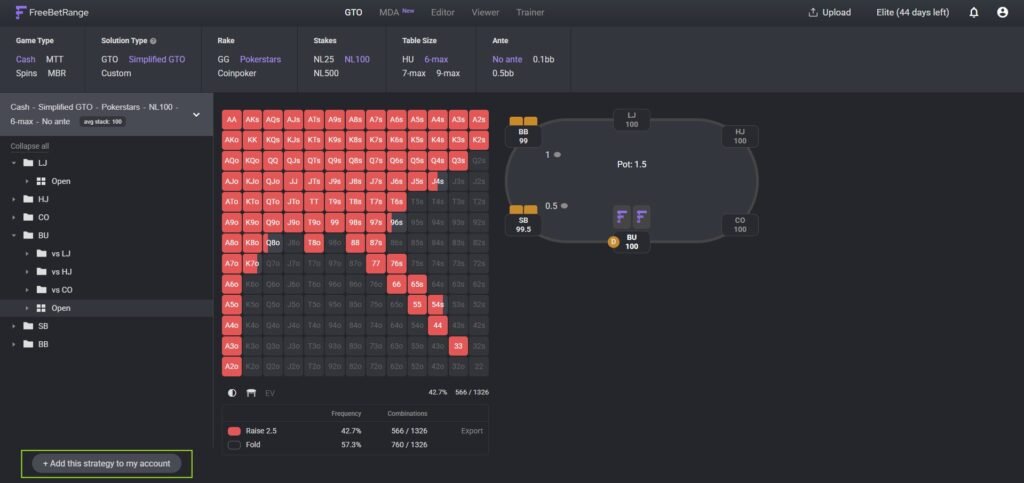
Original GTO or Simplified GTO
The Solution Type filter offers two options. In short: Original is for theoretical study, Simplified is for practice and memorization.
Simplified GTO uses the same ranges but with frequencies rounded to the nearest 25% (0%, 25%, 50%, 75%, 100%). Visually, the difference is minimal, but these ranges are much easier to memorize and apply at the table. For most learning scenarios, this is the right choice.
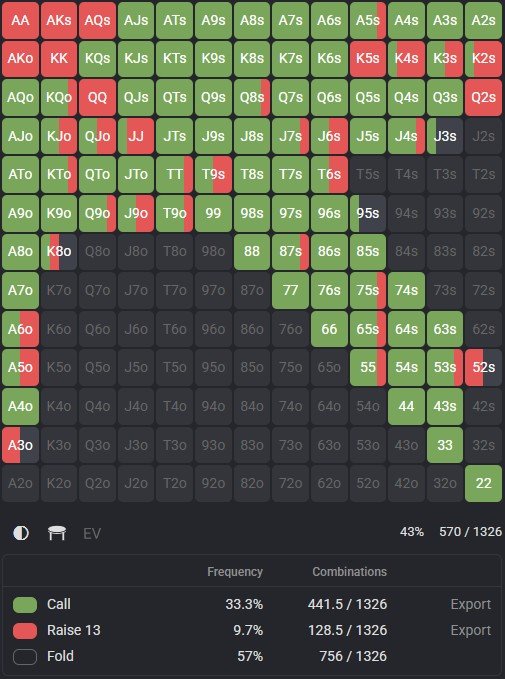
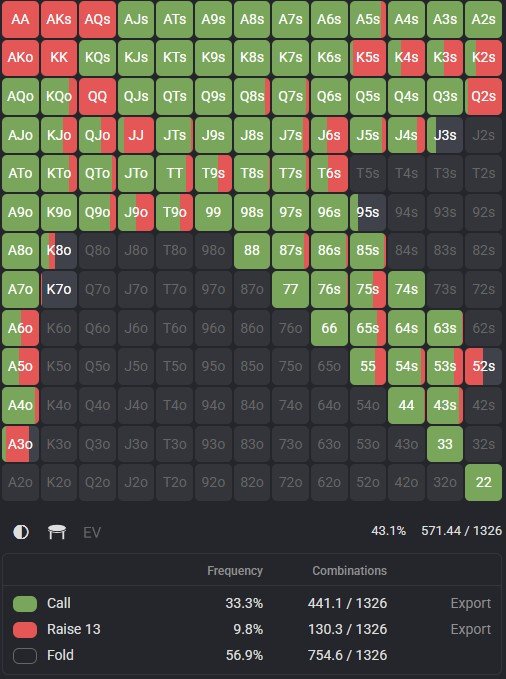
Custom strategies
The third option in the Solution Type filter is Custom. These are packages from specific poker schools and coaches: a GTO base with exploitative adjustments for real games. If you work with a coach or are part of a team, their package may already be available in this section.
How to add a solution to your account
Click “Add strategy to my account” in the bottom-left corner of the library. After that, all ranges from the selected strategy become available in the Viewer, Trainer, and Editor.
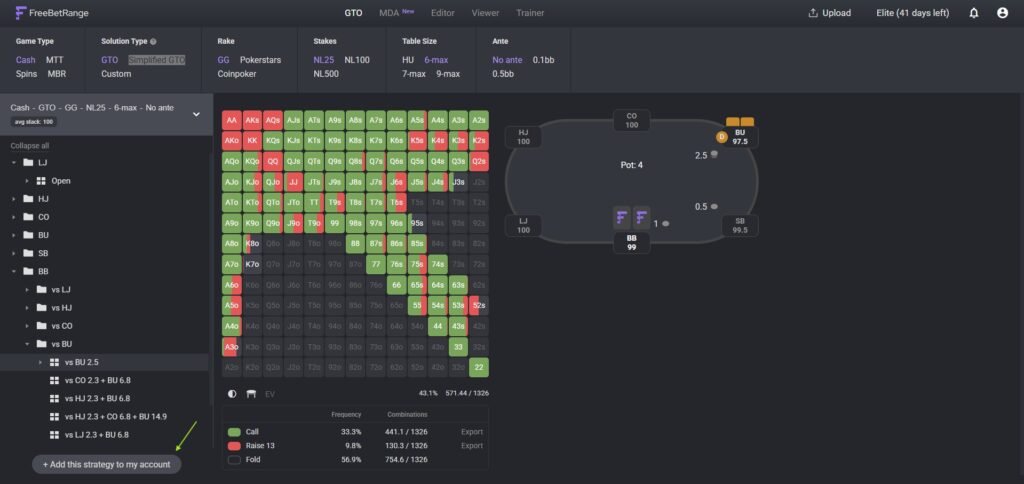
Step 3. Viewer — studying ranges
Viewer is designed for visual range study. Not editing, not training—just studying: you look at the structure and understand the logic.
Single-range mode
By default, Viewer opens in single-range mode. On the left is a 13×13 matrix showing the current spot and table view (if available for the selected range). On the right is navigation through the strategy tree.
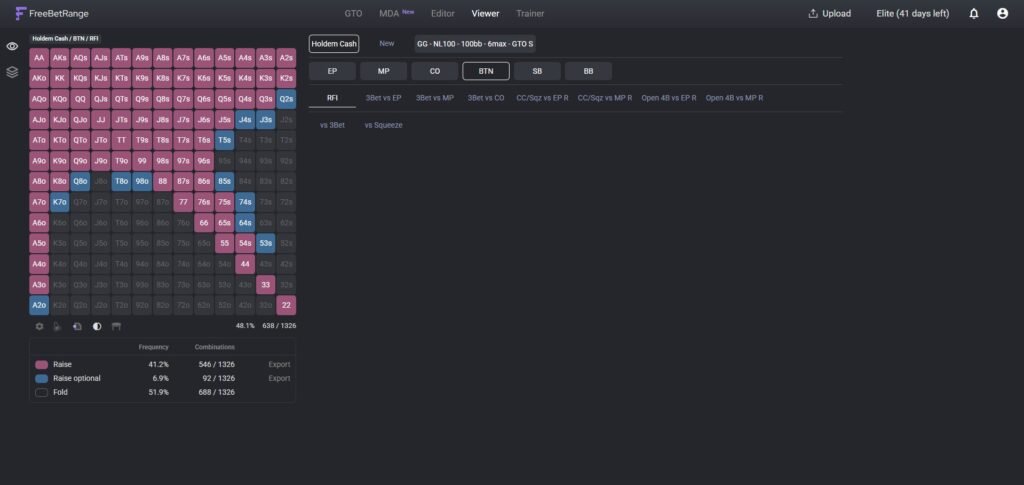
Below the matrix, there are several icons. The table icon toggles the table view. The EV icon switches to expected value (EV) display for each hand in the spot instead of range colors. This helps you understand which hands add value in a given situation and which do not.
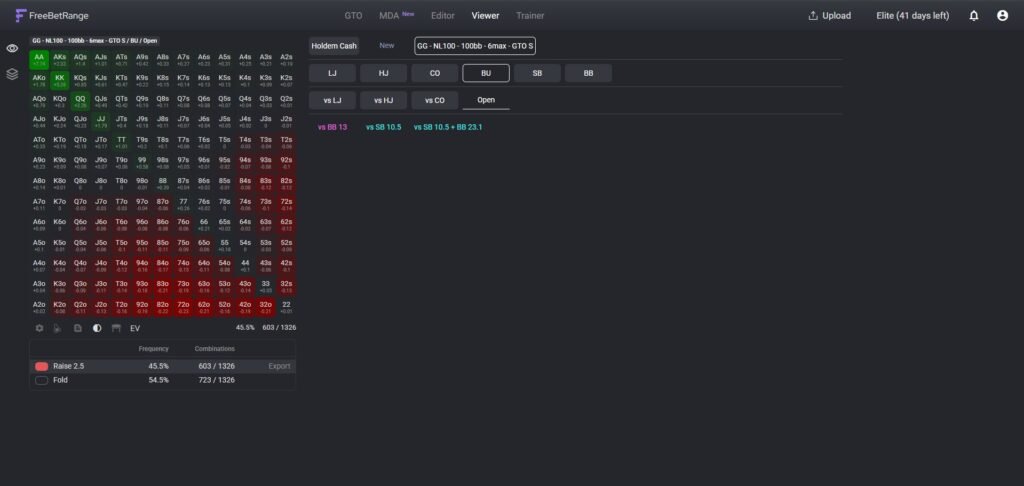
Settings (gear icon) allow you to switch between horizontal and vertical layouts—choose what fits your screen and preferences.
Multi-range mode
You can switch modes using the icons in the top-left corner of the Viewer. You can open up to 30 ranges at the same time and view them side by side.
A practical example: compare BB defense against opens from BTN, CO, HJ, MP, and UTG—and immediately see how the range tightens as positions get earlier. This kind of “single-screen” comparison builds intuition about range structure faster than flipping through them one by one.
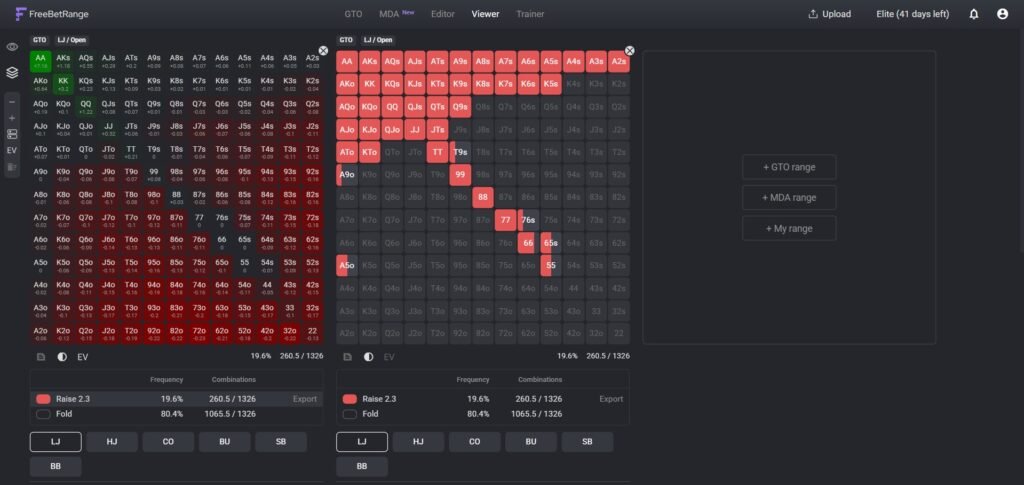
The app automatically remembers your open ranges: if you switch sections and return to Viewer, everything will still be there.
Tip: before jumping into Trainer, spend 10–15 minutes in Viewer. Go through open raise ranges for your format across all positions. Your training will be much more effective once you understand the structure.
Step 4. Trainer — building automatic decisions
Trainer turns ranges from “I know this theoretically” into “I do this automatically.” This is the key section for practical work. The method for learning poker ranges is covered in a separate article. Here, you’ll find everything you need to get started and configure it properly.
First launch — GTO mode
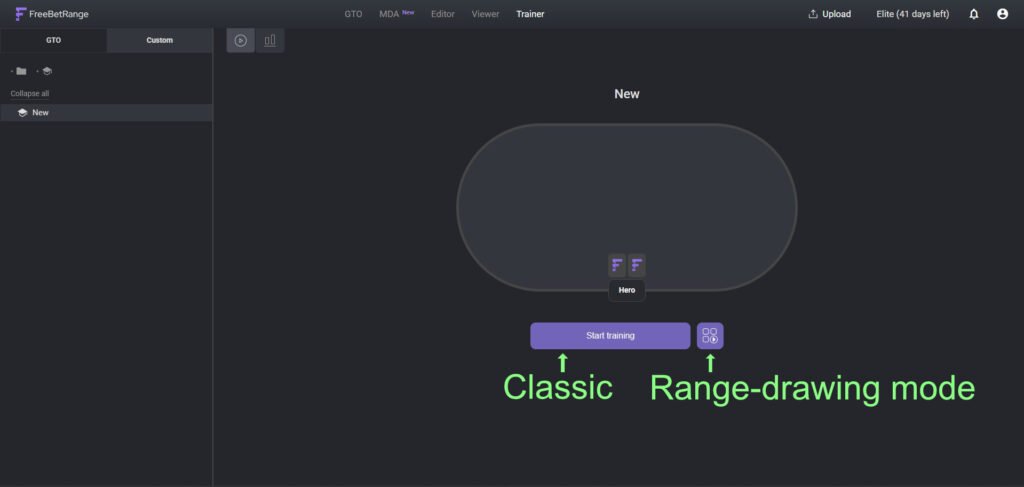
After registration, the left panel in Trainer already contains several ready-made GTO-oriented training sessions for your format. Click any of them to open the session page with its contents and a start button.
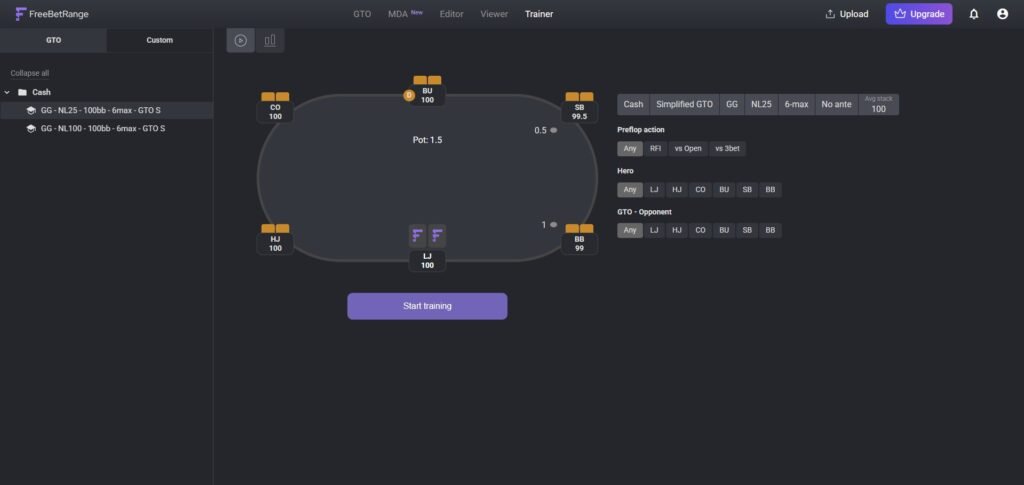
Creating a custom session
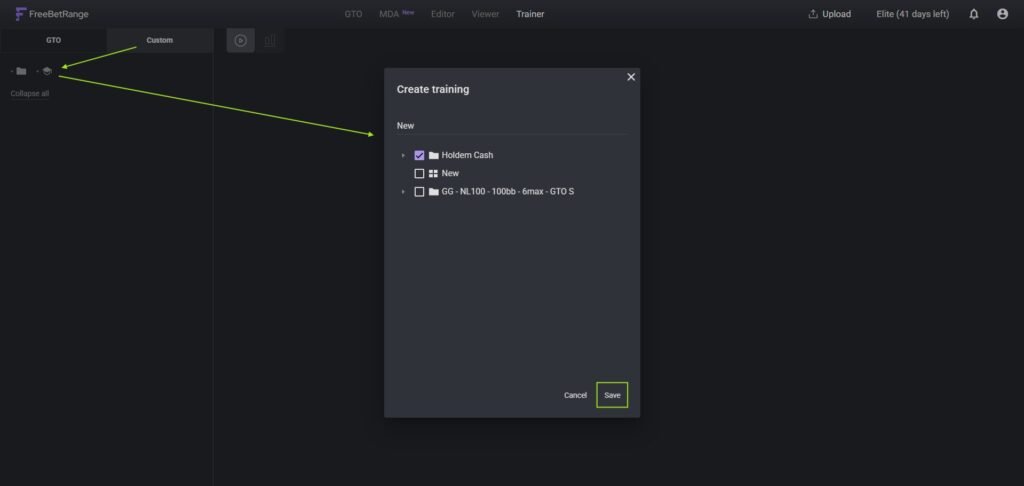
Click “Custom” → “Add training” → enter a name → select ranges from your account → click Save. You can include up to 500 ranges in one session. Sessions can be reordered via drag-and-drop in the left panel.
Classic mode
You are “dealt” a hand like at a real table, and you choose an action: fold, call, or raise. A green frame means correct, and the next hand appears immediately. A red frame means a mistake: the session pauses, and the correct answer is shown.
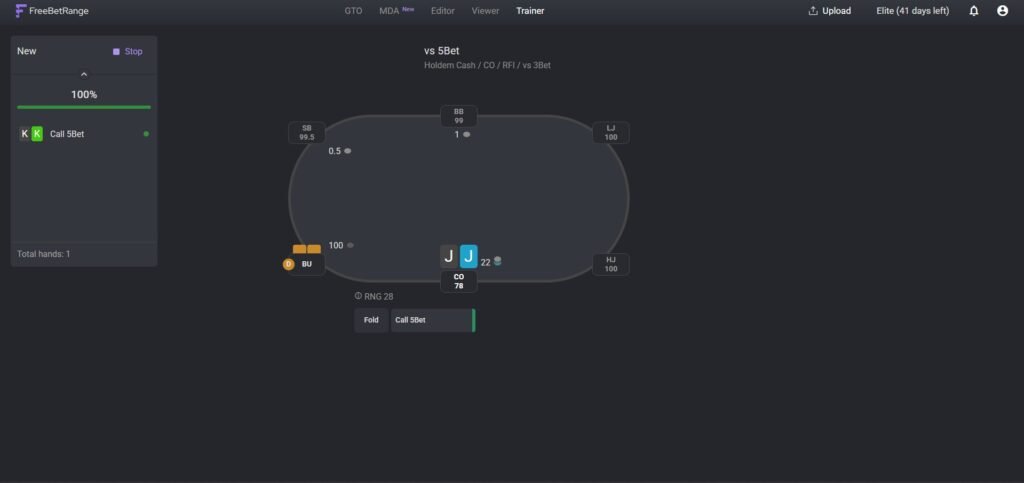
Important Classic mode settings:
Dealing coverage — a filter for dealt hands for each range separately. By default, the script includes hands from the range plus borderline hands outside the range. You can adjust this manually—for example, focus only on hands where you make mistakes most often. This significantly improves training efficiency.
Table view — configures table display for each range: number of players, your position, stack depth, and prior actions. For standard sessions from the Library, this is already set up. It’s mainly needed for custom ranges.
Randomizer (RNG) — a random number generator for mixed strategies (when a hand is split between multiple actions with different frequencies). You can enable or disable it in settings and adjust the scale orientation.
Range-drawing mode
In this mode, you see the name of the range and recreate it in the 13×13 matrix from memory. Click Check to verify—incorrect cells are marked with red dots. Then you can open the original range for comparison using Show original range.
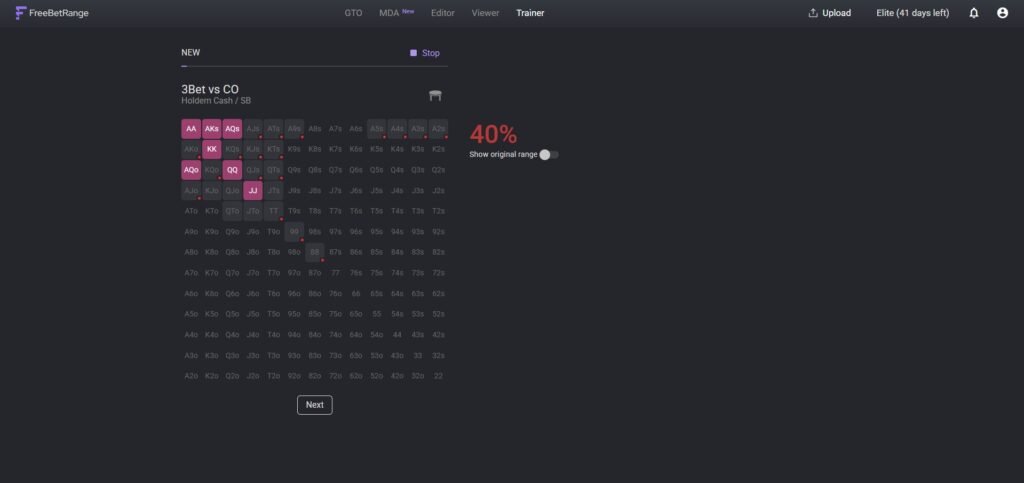
This mode is more time-efficient—you cover more situations per session. It also develops range-based thinking as complete systems rather than individual hands. Both modes complement each other, and the optimal approach is to combine them.
Statistics and heatmap
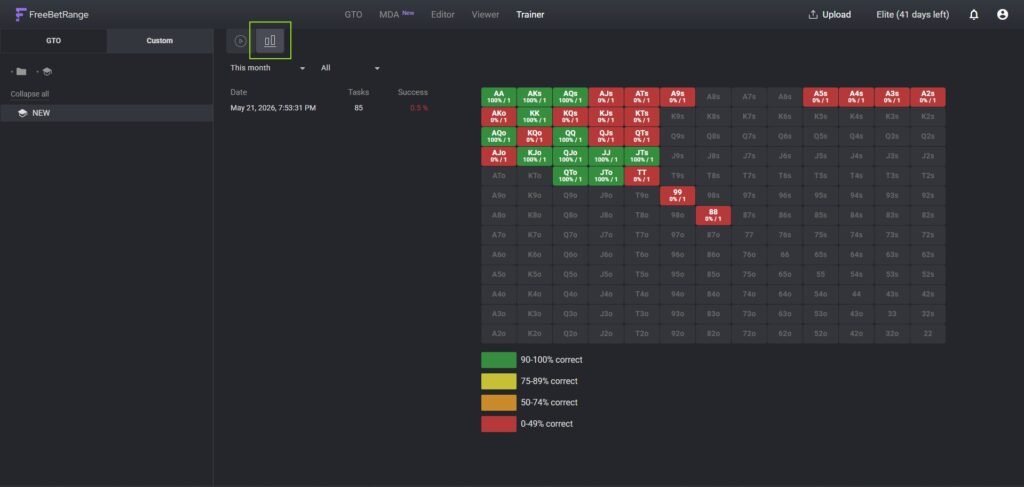
Within each session, there are Classic stats and Range stats tabs with history and accuracy metrics. The Statistics tab shows a matrix with the frequency each hand appears and your correctness rate. Use the heatmap to adjust Dealing coverage: if you see red cells, prioritize those hands in training.
Step 5. Editor — creating and editing ranges
Editor is for when you want not only to learn ready-made ranges but also adapt them to your own strategy: adjust GTO ranges for a specific table, build exploitative versions, or implement a coach’s strategy.
Structure: folders and ranges
The strategy is organized hierarchically: folders → subfolders → ranges. A typical structure looks like this: 100bb → EP → Open Raise. You build this hierarchy according to your needs.
The fastest way to start is not from scratch but using Clone Folder: right-click a folder → Clone Folder. This creates a full copy with all nested folders and ranges. The original remains untouched while you work in the copy.
Working with the matrix
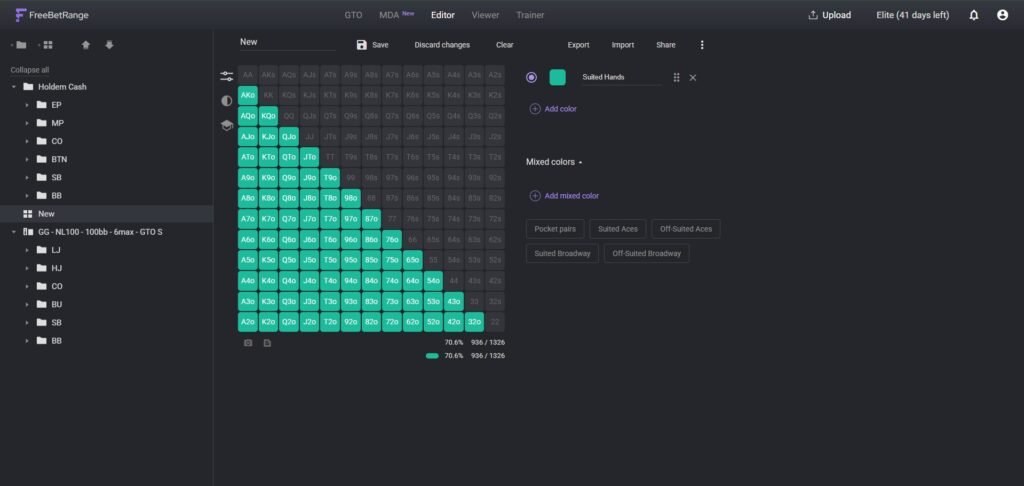
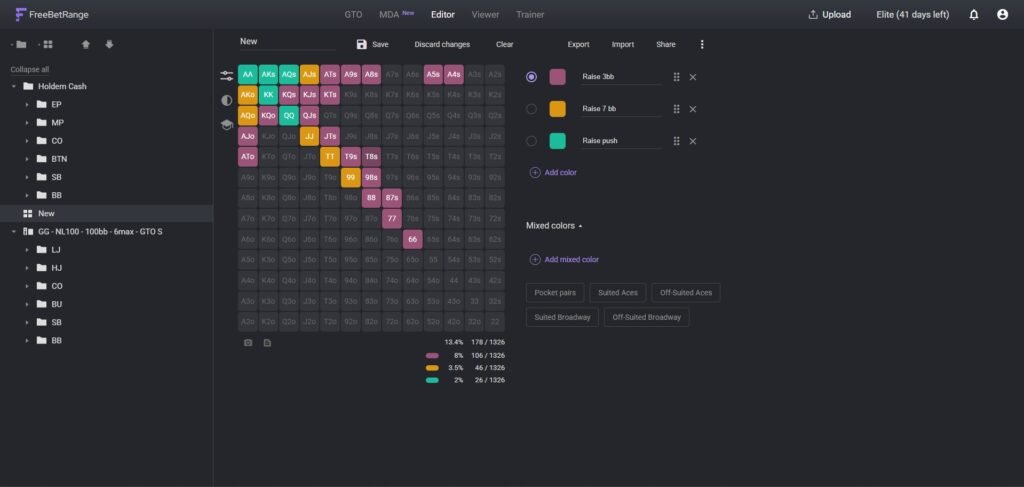
Open a range—you’ll see the 13×13 matrix. Click cells (or select multiple), assign a color/action. The Pro plan supports up to 40 colors and weighted frequencies for mixed strategies. Colors can be configured via Settings in the user menu—changing colors does not affect existing ranges.
Subranges
You can create a continuation for any range—a subrange: right-click → Create subrange. When creating it, choose which colors (lines from the parent range) it applies to—or all at once. This is how a full tree is built: Open Raise EP → vs 3Bet CO, vs 3Bet BTN, vs 3Bet SB, etc.
Additional Editor features
Clone range — creates a copy of a single range. Useful when you need a similar range for another position: clone it, rename it, and adjust a few cells.
Drag & Drop — any range or folder can be moved into another folder by dragging.
Notes — you can add text notes to any range. Useful when working in a group or when your strategy includes conditional logic.
Step 6. Importing ranges
If you already use other tools, you can import ranges directly without manual transfer.
Importing a single range
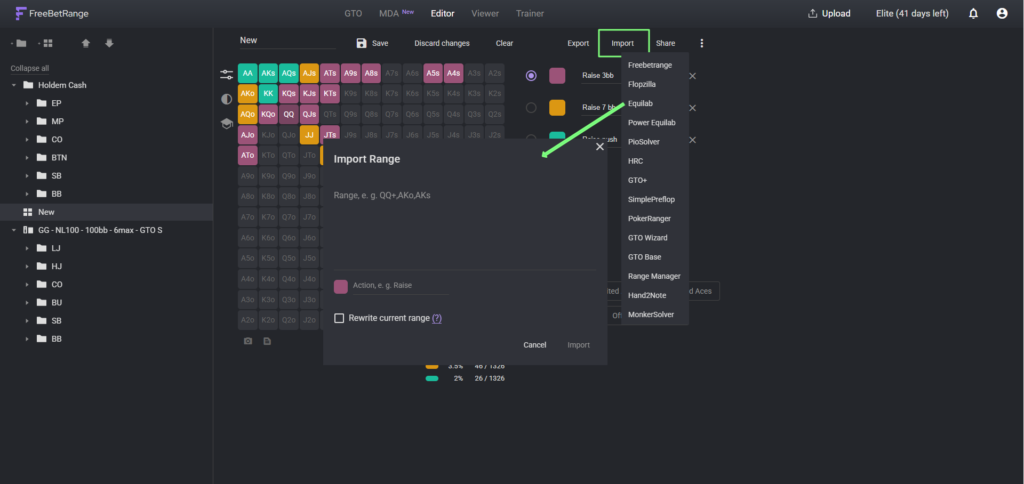
Open the desired range in Editor, then use the import function and paste the text format from the source application. Supported tools include Flopzilla, Equilab, PioSolver, GTO+, Hand2Note, PokerCruncher, and more than 10 others in the Pro plan. In the free plan, only Flopzilla and Equilab are supported.
Importing account configuration
The .fbrange2 format is a file containing the full configuration: all folders, ranges, and training settings. It can be imported via Import Configuration in the menu.
The main use case: your coach exports their configuration and sends you the file. You import it and instantly get the entire structure of their strategy in your account. The same approach works within poker teams.
Mass import from HRC
For bulk import from HoldemResources Calculator, there is a dedicated feature—Mass Import from HRC. This is especially relevant for tournament players working with large libraries of ICM solutions. We recommend checking the dedicated article on using HRC together with FreeBetRange.
Step 7. Sharing ranges
Quick Share is a way to instantly share a range with a coach, study partner, or on a poker forum.
Open a range in Editor and click the camera icon below the matrix. A link to a screenshot of the range will be copied to your clipboard.
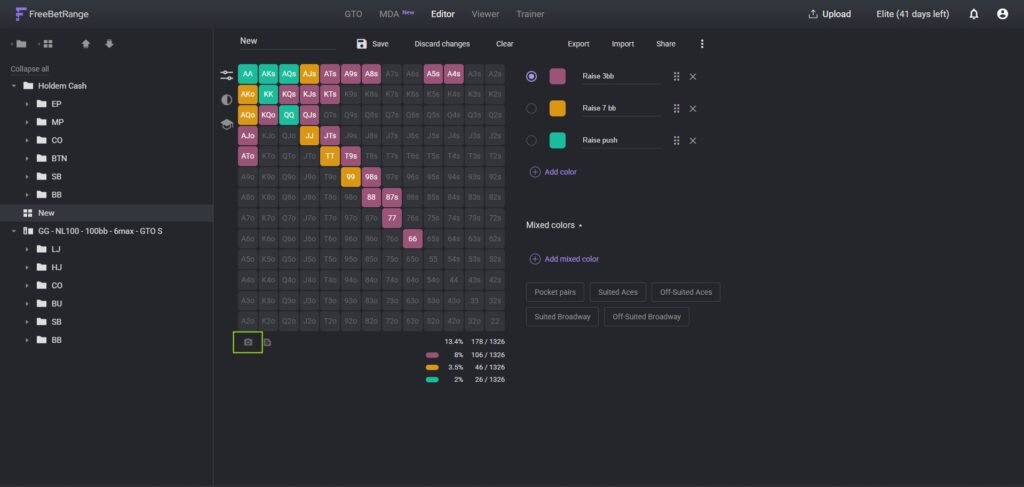
You can paste the link into any messenger—it will automatically expand into an image of the range directly in the chat. On forums, use the [img] BB code to embed it.
If you need to share all ranges at once, use Export Configuration (a .fbrange2 file), not Quick Share. These are different tools for different purposes: Quick Share is for a single range and quick display, Export is for transferring a full strategy.
Step 8. MDA — population ranges
MDA is a section for analyzing real population ranges, built on a database of 300+ million hands. It is available in the Elite plan (the free plan includes access to only one spot—LJ Open at NL25-50 for preview).
How to use filters
All MDA filters group parameters rather than splitting them by individual rooms:
Rooms: two clusters—Classic (major regular rooms: PokerStars, GG, WPN, 888, iPoker, and others) and Apps (poker apps and club platforms: PokerBros, PPPoker, X-Poker, and others). This grouping ensures statistically significant samples, especially for recreational player archetypes.
Stakes: NL25-50 / NL100-200 / NL500+
Table Size: HU / 3-6 max / 7+ max
Ante: No Ante / Ante
Player type — the key filter:
- Reg: VPIP < 35, PFR < 30 (for SH)
- Fish 35-50: VPIP 35–49
- Fish 50+: VPIP > 50
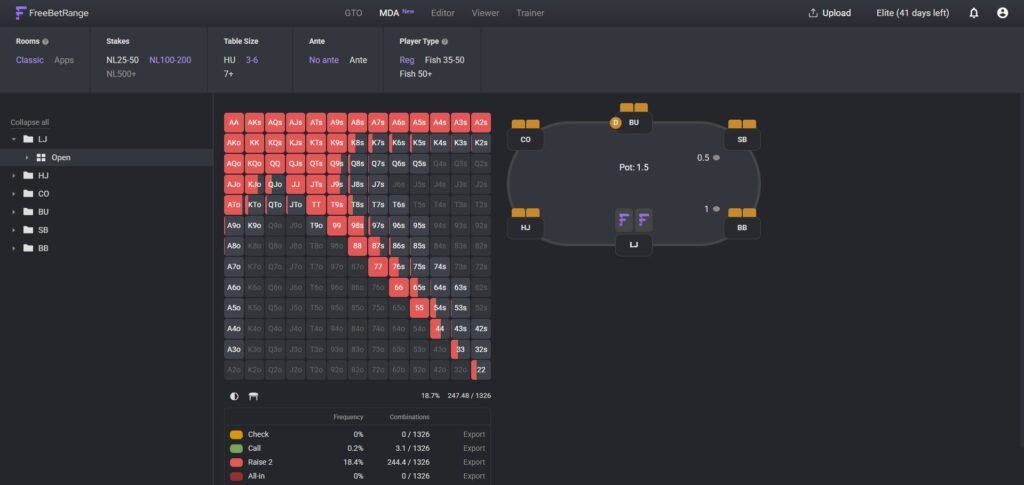
When you change any filter, the decision tree updates automatically.
Navigating the tree
MDA displays the full preflop decision tree for the selected archetype. Navigate through branches just like in the GTO Library: position → action → response position.
Exporting from MDA
Below each range matrix, there’s a legend with actions. Each action has an Export button: clicking it copies the range to your clipboard. You can then paste it into the Editor (to create a new range) or load it into external tools like PioSolver or GTO Wizard to calculate optimal counter-strategies.
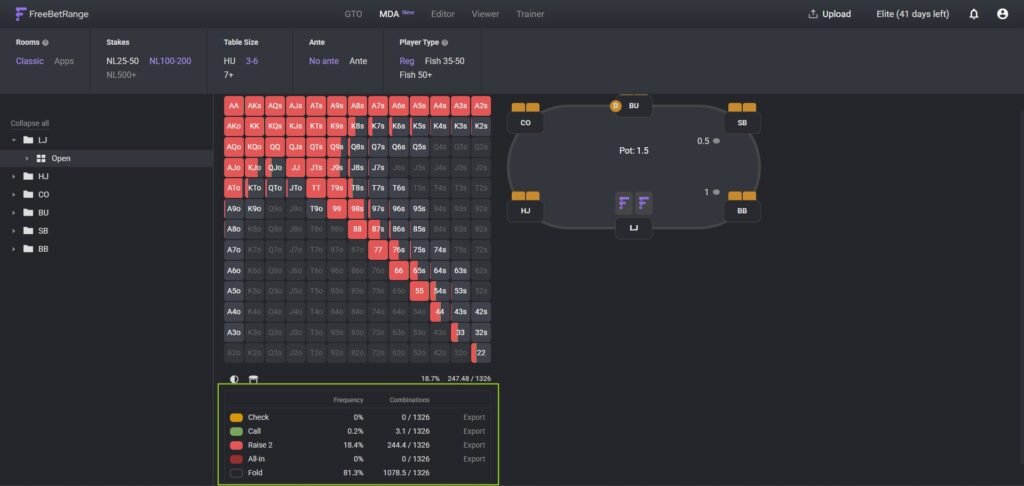
Recommended starting path
If you’ve just signed up, here’s a clear sequence to follow:
Days 1–2. Register → choose your format during onboarding → go to GTO Library → select Simplified GTO for your games → review open raise ranges across all positions. You can also add strategies from the Library to your account and study ranges in the Multi-Range Viewer.
Days 3–5. Start Classic mode in Trainer. Begin with one or two positions. Don’t try to learn everything at once—consistency matters more than volume. After each session, review the heatmap.
Days 6–7. Add Range-drawing mode. Adjust Dealing coverage based on the problem hands shown in the heatmap.
Summary
FreeBetRange is not a set of separate tools, but a unified ecosystem for studying preflop. GTO Library provides a solid theoretical foundation, Viewer helps you understand it, Trainer helps you memorize it, Editor lets you adapt it to your needs, and MDA shows how real players deviate from GTO. Using these sections together gives you a complete system for working on your preflop strategy.
Master GTO preflop strategy, build your own ranges, and train smarter — all in one powerful tool.
Try FreeBetRange